How a Minor Pole Strike Totaled a Chevrolet Malibu: A Blueprinting Case Study
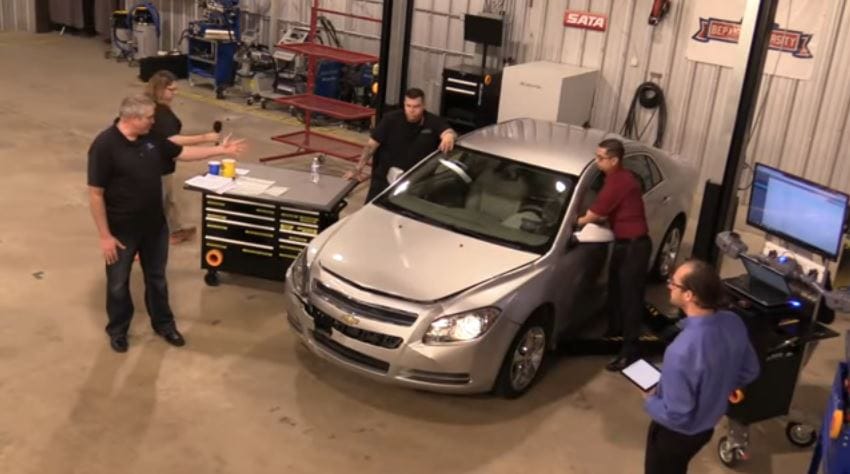
No airbags deployed. The car carried four occupants. A simple pole strike — the kind of impact that might prompt an owner to seek a quick estimate and drive away. And yet, by the time a Collision Hub "Repair University Live" episode worked through the full blueprinting process on a 2012 Chevrolet Malibu LT, the vehicle was a total loss.
"We have totaled this poor Malibu," Collision Hub CEO Kristen Felder said during the April 2018 show.
The episode wasn't just a dramatic reveal. It was a detailed demonstration of why proper blueprinting — the systematic application of OEM research, pre-scanning, and premeasurement before writing a repair estimate — produces fundamentally different outcomes than quick visual assessments.
The Vehicle and the Collision
The 2012 Malibu had struck a pole with a driver and three passengers aboard. Airbags did not deploy, though at least one seatbelt was locked up — which P&L Consultants co-owner Larry Montanez flagged as likely indicating a "low-speed event."
A Kelley Blue Book value for a 2012 Malibu in the relevant zip code put the vehicle at approximately $7,598 private party and $9,350 from a dealer.
By the midpoint of the blueprinting demonstration, the estimate had reached $5,100 — and that was before Vehicle Collision Experts CEO Mark Olson had finished describing what replacing the damaged front frame rails actually required.
What Proper Blueprinting Requires
The show described a two-person process — an estimator and a blueprint technician working in close coordination. These should be "the two most in-sync people in your shop," Felder said. The estimator should be physically present during disassembly and blueprinting, not receiving a list of line items after the fact.
Felder said it was frustrating, when she worked as an insurance adjuster, to interact with estimators who had line items on a sheet but couldn't explain why any particular item was necessary. Montanez added that the damage assessor doesn't need to physically perform the repair — but they need to understand it well enough to explain it clearly.
Step 1: Customer Interview
Before touching the vehicle, find out everything about the collision. In this case: the driver was a 200-pound male, front passenger was 120-pound female, two rear seats occupied — one by a child in a car seat, one by a child on the seat. The airbags did not deploy.
That occupant information matters for seatbelt inspection procedures. The vehicle loading matters for restraint system evaluation. The accident description directs where to look for damage.
Step 2: OEM Research
Olson produced a substantial sheaf of documents representing the GM repair procedures relevant to this vehicle. Some of those procedures — including replacement steps for the damaged frame rail — were not available in GM's free body repair manual. They required access to GM's paid repair procedure site.
"All this other stuff is not in the free body repair manual," Olson said. This is not an unusual situation. General Motors has explicitly stated that the free collision repair manual is insufficient for proper modern repairs, and the paid site content is required.
The hyperlinks connecting related procedures within the paid site are also disabled in the free version — making it harder to navigate from the primary repair to the interconnected procedures that the repair triggers.
Step 3: Pre-Repair Scan
After the vehicle was pre-washed, the first step was a pre-repair scan. A variety of fault codes were revealed. OEMs generally recommend using their own scan tools; however, the Mitchell tool used during the demonstration was described as functional for about 80 percent of cases and "invaluable" for blueprinting work.
Step 4: Premeasurement
"Every single car. It's your liability protection," Montanez said about premeasuring.
The show used a Matrix Wand for premeasurement — a tool that provides initial measurements without requiring the full setup and measuring process a frame bench involves. The Wand found measurements off by 4 mm on the passenger side and 9 mm on the driver side.
Matrix Wand director of support and technical training Sergio Correa also worked underneath the vehicle on a two-post rack. The cradle was square but had shifted from rail movement, and one control arm was misaligned by 6 mm. The vehicle needed at minimum a wheel alignment and cradle readjustment.
Structural movement of any kind triggers a wheel alignment requirement, Montanez noted. The structural misalignment of the core support alone established that a wheel alignment check was necessary.
Step 5: OEM Procedure-Driven Estimate
The frame rail replacement process alone cascaded into a substantial list of required steps — most of them not-included:
- Loosening and protecting fuel and brake lines
- Supporting the engine and transmission with suitable equipment
- Removing engine and transmission fasteners
- Removing the suspension and crossmember
- Disabling the supplemental restraint system and battery
- Battery disconnect triggering its own set of additional diagnostic procedures
- Painting the replacement rail
- Applying OEM-approved weld-through coating to mating surfaces
- Proper corrosion protection
Applying the weld-through coating required researching which coating GM had approved — it's not as simple as reaching for any product on the shelf.
"We're just building book, after book, after book, after book," Olson said.
The Liability of Doing It Wrong
The show's three hosts all serve as expert witnesses in collision litigation. Their perspective on what happens when these steps are skipped is grounded in actual courtroom experience.
Felder's line to shops: "I don't have to prove what you did. I only have to prove what you didn't do."
Olson's paraphrase of Gerber's Rex Dunn: "The only difference between two repairers is what you decide to do for free. There's actually only one way to fix a car."
Montanez addressed the insurance argument directly: "There is no policy in the United States that says, 'We don't pay for OEM procedures.'"
Shops have the ability to make business decisions about what they choose to bill for. They do not have the ability to make business decisions about what they choose to do. Skipping OEM-required procedures to speed up a repair or reduce an estimate is accepting liability for that choice.
The Quick Visual Estimate Trap
Montanez described his approach to vehicles like this Malibu: he doesn't write estimates. He writes final repair bills. His initial response to a vehicle with visible damage would be to tell the customer not to drive it and write: "Price to exceed four thousand dollars. More disassembly required."
Visual assessments of damage severity are systematically unreliable. Felder cited a Collision Hub investigation in which shops were asked to identify vehicles in their lot with no structural damage. Premeasurement found that 4 out of 10 of those "no damage" vehicles had structural misalignment — sometimes significant, with 18 to 20 mm of travel damage present.
You cannot estimate what you haven't measured. And you cannot measure what you haven't premeasured before someone drives the car away.
What a Minor Collision Actually Costs to Fix Right
The Malibu case is a useful benchmark for understanding how quickly proper collision repair procedures can escalate a seemingly minor repair. No airbag deployment, a low-speed event, an everyday family sedan — and still a total loss once the full scope of OEM-required work was understood.
That's not a problem with blueprinting. That's blueprinting doing its job.
